
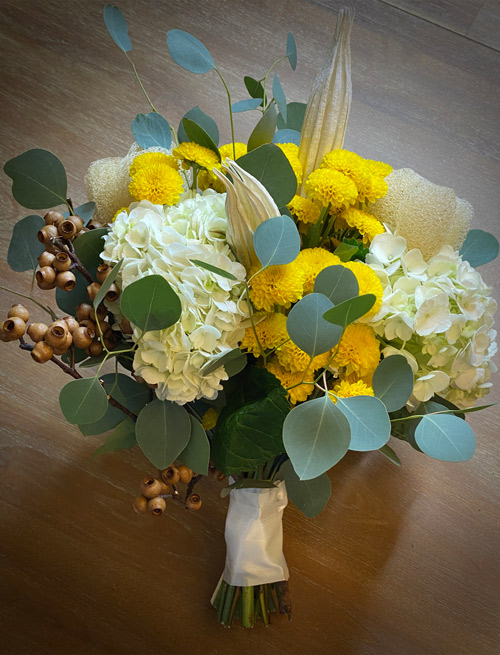
Learn “How-To” make this rustic bouquet with dried flower accents with these simple steps. You can save plenty of dollars by choosing to ‘DIY’ wedding flowers. Saving towards your budget is a great feeling and creating a DIY bouquet is a fun way to add an extra special, personal touch. You can certainly do this! Create beautiful bouquets and SAVE!
What You’ll Need to Make a DIY Wedding Bouquet
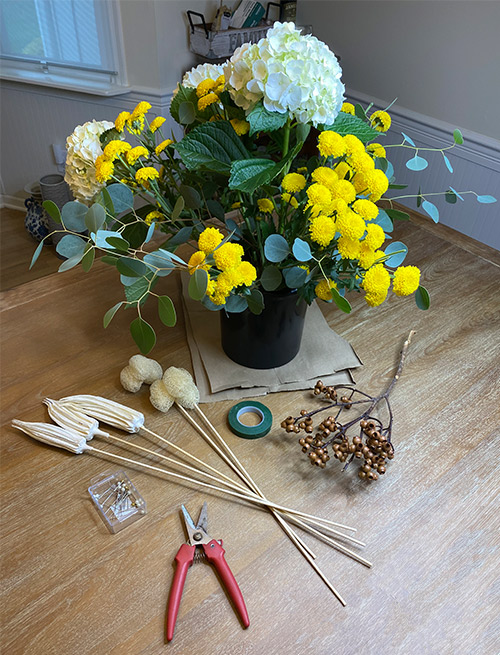
When you receive your flowers, prep them and put them in a bucket of water for rehydration. For this bouquet, I added my favorite dried flower accents. Choose the dried flowers you would like to use in your bouquet.
Supplies you will need:
3 stems of Large White Hydrangeas
5-6 stems of Yellow Pompon Buttons
5-8 stems of Silver Dollar Eucalyptus
Floral Tape
Floral Scissors
Favorite Ribbon (I used white satin)
4-5 stems of your Dried Flower Accents
Dried Flowers Bulk Box

Bloom’s sells a dried flower bulk box with some great items to pick from! You can use the extra stems for the ceremony flowers and decorate reception with them. Mix them into your door swags, wreaths, welcome sign, or statement pieces.
Check out our dried flower story on Pinterest for more arrangement ideas!
How to Assemble a DIY Wedding Bouquet
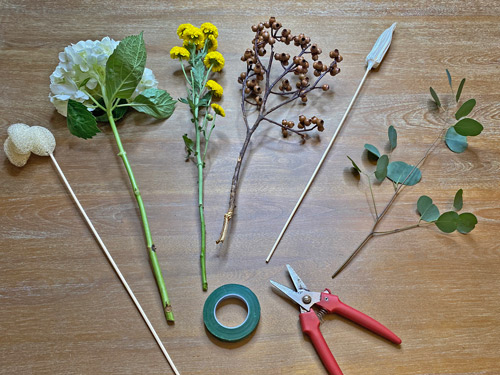
Make your bouquet the day before your wedding. Before arranging your bouquet, give each flower a quick quality check, removing brown petals and stripping the stems of all unnecessary foliage.
Step 1– Arrange your bouquet from the inside out. Start with adding hydrangea, then adding the yellow pompon buttons, add a stem of greenery until you have approximately five stems together. Add a dried flower accent.
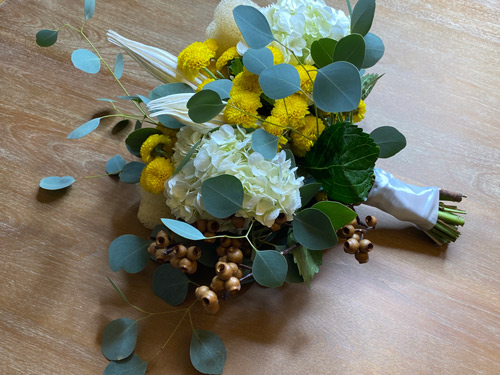
Step 2– Keep adding the flowers white, holding the bouquet tightly, and looking at it in a mirror to see all sides. Make sure the silver dollar eucalyptus sprigs of greenery are dispersed throughout the bouquet between the flowers. Being in front of a mirror helps to see the bouquet while you are creating it and adjusting the flowers to check the progress.
Step 3– Finish your bouquet with sprigs of silver dollar greenery around the edge.
Before you wrap the stems, it is important to stand in front of the mirror, holding the bouquet low to see how it will look when the bride is walking down the aisle. You can gently pull the flowers and adjust them before you wrap the stems tightly with tape.
Step 5– Wrap the bouquet stems over the floral tape with your ribbon. Pin it at the top and begin to wrap the ribbon around the floral tape several times, making sure it is completely covered. For the final step, cut the stems all the same length, so your stems are even. Place your finished bouquet in a vase of fresh clean water and store it in a cool place to rehydrate overnight without soaking the ribbon.

Pro Tip * You can also put the ribbon on your bouquets a few hours before the ceremony.
We also have more tips & trends on “How-To” DIY your flower arrangements.
Tina Merola
As a professional designer with over twenty years of industry experience, Tina's lifelong creative passion has enabled her to pursue her artistry and vision in various professional environments. Drawing on her knowledge from floral techniques and tips from the industry’s leading professionals allows her the opportunity to channel her love of the unique beauty of nature’s many wondrous blooms into stunning floral designs.